
How to Take a Screenshot on a Lenovo Laptop?
Detailed Lenovo screenshot guide for ThinkPad, IdeaPad, Yoga, Legion and other Windows models.
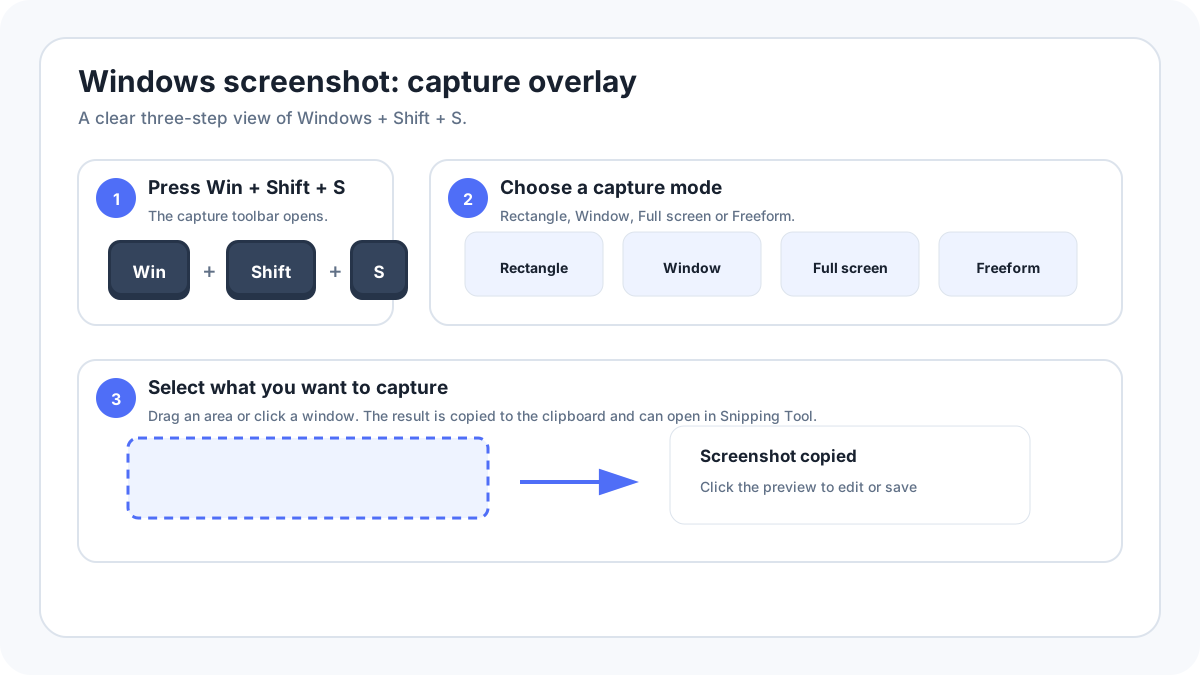
Lenovo laptops use Windows screenshot features, so the most reliable method is usually WindowsShiftS. The main brand specific difference is keyboard layout: Print Screen may be dedicated, abbreviated, represented by an icon or placed on a shared function key.
Best method on a Lenovo laptop
- Open the screen you want to capture.
- Press WindowsShiftS.
- Choose Rectangle, Window, Full screen or Freeform.
- Select the content, then open the Snipping Tool preview to save or edit.
Use the Print Screen key
ThinkPad and consumer Lenovo keyboards can differ substantially, so use the printed PrtSc/PrtScn symbol rather than assuming one brand wide Fn combination. Look for PrtSc, PrtScn, Print Scr or a screenshot symbol. If it shares another function, try the Fn modifier based on the printed keyboard legend rather than assuming one fixed brand shortcut.
Common shortcuts
| Shortcut | Result |
|---|---|
| WindowsShiftS | Open Snipping Tool capture overlay |
| PrtScn | Usually copy the whole desktop to clipboard |
| AltPrtScn | Copy the active window |
| WindowsPrtScn | Usually save full desktop to Pictures › Screenshots |
Lenovo model families
Keyboard layouts can differ across ThinkPad, IdeaPad, Yoga, ThinkBook and Legion families. A shortcut shown for one model family should not be treated as universal if your own key legends differ. WindowsShiftS avoids most of these keyboard layout differences.
Where the screenshot is saved?
WindowsPrint Screen normally creates a file in Pictures › Screenshots. Print Screen or AltPrint Screen normally creates a clipboard image that must be pasted. Snipping Tool lets you save the capture and can use its own automatic save settings depending on Windows version.
Screenshot only one window
Use WindowsShiftS › Window mode and click the target window. The classic clipboard alternative is AltPrint Screen. This is safer than sharing a full desktop screenshot that might expose another app or monitor.
If the key is missing or broken
- Open Snipping Tool from Start and use the on screen New button.
- Pin Snipping Tool to the taskbar for one click access.
- Use the Windows on screen/accessibility tools where appropriate.
- If a shared function key is unclear, check the exact keyboard legend or model manual instead of trying random Fn combinations.
Troubleshooting
- Test WindowsShiftS first.
- Check whether Windows is configured so Print Screen opens Snipping Tool.
- Temporarily close keyboard remapping or gaming overlay utilities.
- Test on the Windows desktop; one protected app may block capture.
- Check Pictures › Screenshots and the clipboard before concluding that the screenshot disappeared.