
Mac पर स्क्रीनशॉट कैसे लें
Mac की पूरी गाइड: Command + Shift + 3, 4 और 5, window capture, clipboard, save location और troubleshooting।
सबसे तेज़ तरीका: ⇧ Shift + ⌘ Command + 4
क्या होता है: Pointer को crosshair में बदलता है ताकि आप चुना हुआ area capture कर सकें।
कहाँ सेव होता है: Default रूप से Desktop पर save होता है, जब तक Screenshot options में location न बदलें।
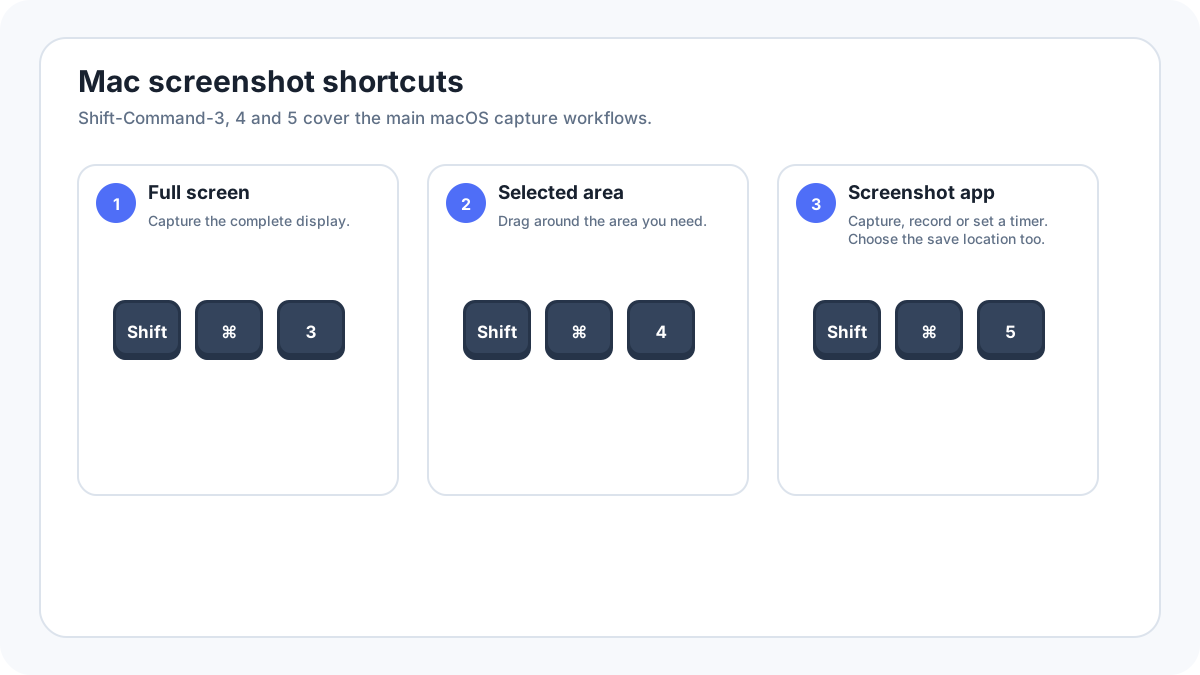
Mac screenshot shortcuts एक नज़र में
| Shortcut | क्या करता है |
|---|---|
| ShiftCommand3 | पूरी screen capture करता है |
| ShiftCommand4 | चुने हुए area के चारों ओर drag करके capture करता है |
| ShiftCommand4, फिर Space | एक window या menu capture करता है |
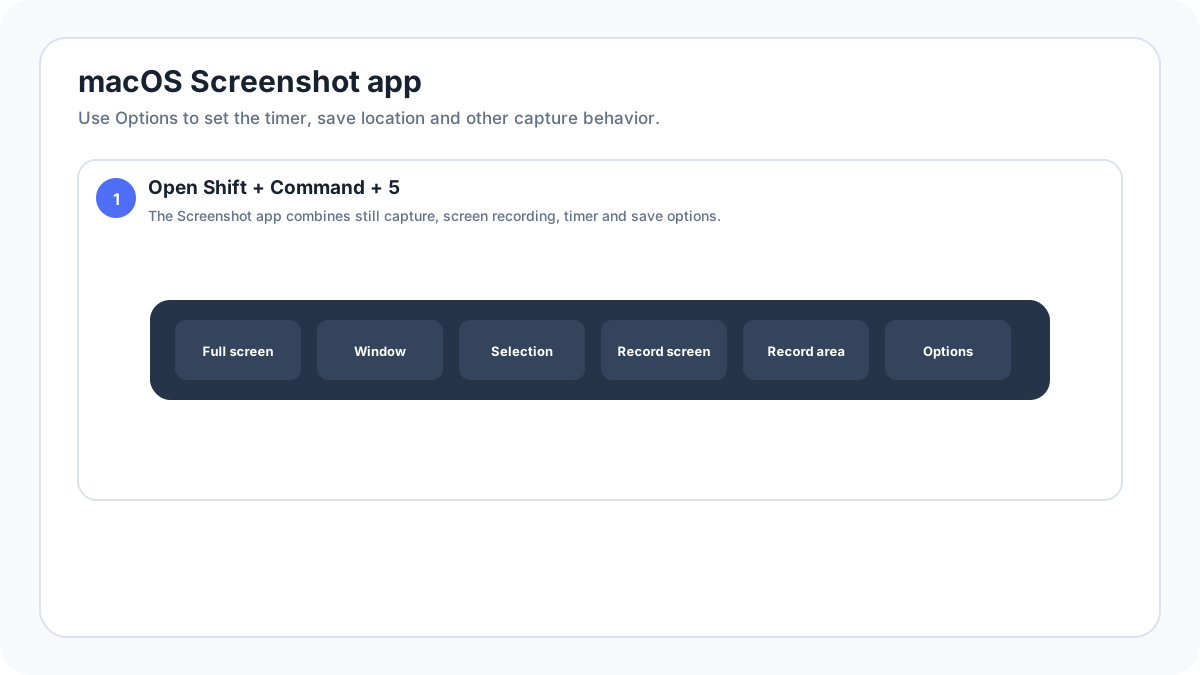
| ShiftCommand5 | Screenshot app खोलता है: capture, record, timer और save location |
| Control जोड़ें | कई screenshot combinations को file की जगह clipboard पर भेजता है |
पूरी screen capture करें
- ShiftCommand3 दबाएँ।
- Floating thumbnail दिखाई दे तो तुरंत edit करने के लिए क्लिक करें, या file save होने दें।
- Default रूप से Desktop पर image देखें, जब तक destination बदला न हो।
Screen का चुना हुआ हिस्सा capture करें
- ShiftCommand4 दबाएँ।
- Pointer crosshair बन जाता है।
- ज़रूरत वाले exact area के चारों ओर drag करें।
- Capture के लिए mouse/trackpad छोड़ें। Cancel करना हो तो release करने से पहले Escape दबाएँ।
एक window या menu capture करें
ShiftCommand4 दबाएँ, फिर Space दबाएँ। Pointer camera बन जाता है। Window या menu पर pointer रखें और क्लिक करें। पूरी desktop लेकर बाद में crop करने की तुलना में result अधिक साफ होता है।
ShiftCommand5 से Screenshot app इस्तेमाल करें
Screenshot app में पूरी screen, एक window या चुने हुए portion को capture करने और screen record करने के controls होते हैं। इसका Options menu save location चुनने, timer सेट करने, floating thumbnail control करने और pointer behavior बदलने देता है।
Mac screenshots कहाँ save होते हैं
Default रूप से macOS screenshots Desktop पर date/time वाले filenames के साथ save करता है। Screenshot app में ShiftCommand5 खोलकर Options से destination बदला जा सकता है। यदि shortcut में Control जोड़ते हैं तो capture file बनाने के बजाय clipboard पर जाता है।
Screenshot को clipboard पर copy करें
Standard screenshot shortcut में Control जोड़ें। उदाहरण: ControlShiftCommand4 चुने हुए area को file save करने की जगह clipboard पर कॉपी करता है। फिर Command + V से compatible app में paste करें।
macOS Tahoe 26 में HDR screenshots
Apple की मौजूदा documentation के अनुसार supported Mac models पर macOS Tahoe 26 या बाद के version में Screenshot options से SDR (Most Compatible) को PNG में या HDR को HEIF में चुना जा सकता है। Compatibility सबसे महत्वपूर्ण हो तो SDR/PNG चुनें; HDR तभी चुनें जब आपका workflow और destination उसे support करते हों।
Mac पर scrolling screenshot कैसे लें
macOS में ऐसा एक universal keyboard shortcut नहीं है जो हर app को पूरा scroll करके अपने आप stitch कर दे। Webpages के लिए browser की full page feature या print/export to PDF इस्तेमाल करें। Documents के लिए जहाँ संभव हो app का PDF/export function चुनें। Long app interfaces के लिए trusted scrolling capture utility या multiple overlapping screenshots इस्तेमाल करें। अलग Mac scrolling screenshot guide content type के अनुसार सुरक्षित विकल्प समझाता है।
Screenshot edit और annotate करें
Floating thumbnail पर क्लिक करके Markup खोलें, या saved image को Preview में खोलें। वहाँ crop, shapes, text, drawing और signatures जैसी tools मिलती हैं। Private जानकारी share करने से पहले solid redaction या crop इस्तेमाल करें।
Mac screen record करें
ShiftCommand5 से Screenshot app खोलें और पूरे screen या selected portion recording चुनें। Motion, software workflow या timed sequence दिखानी हो तो recording screenshot से बेहतर है।
Mac screenshot काम नहीं कर रहा
- System Settings में keyboard shortcuts disabled या remapped तो नहीं हैं, जाँचें।
- External keyboard इस्तेमाल कर रहे हों तो Command और Shift keys सही काम कर रही हैं या नहीं test करें।
- Screenshot app को Applications/Utilities या Spotlight से सीधे खोलें।
- Destination folder writable है या नहीं और disk space उपलब्ध है या नहीं देखें।
- यदि केवल एक protected app में capture fail होता है तो app जानबूझकर screenshot block कर सकती है।
- Third party screenshot utilities shortcut conflict कर रही हों तो उन्हें अस्थायी रूप से बंद करें।
और Mac screenshot guides
- Mac पर scrolling screenshot
- Mac screenshots कहाँ save होते हैं
- एक Mac window capture करें
- Mac screen recording
सत्यापन स्रोत: Apple Support, Mac पर screenshot लें. इंटरफ़ेस के शब्द सिस्टम संस्करण, निर्माता और कीबोर्ड लेआउट के अनुसार थोड़ा बदल सकते हैं।